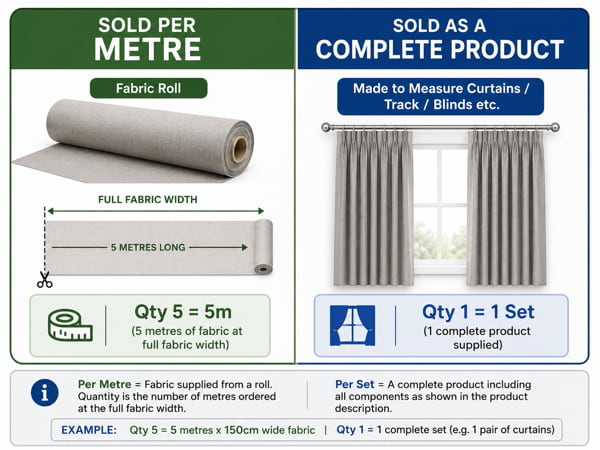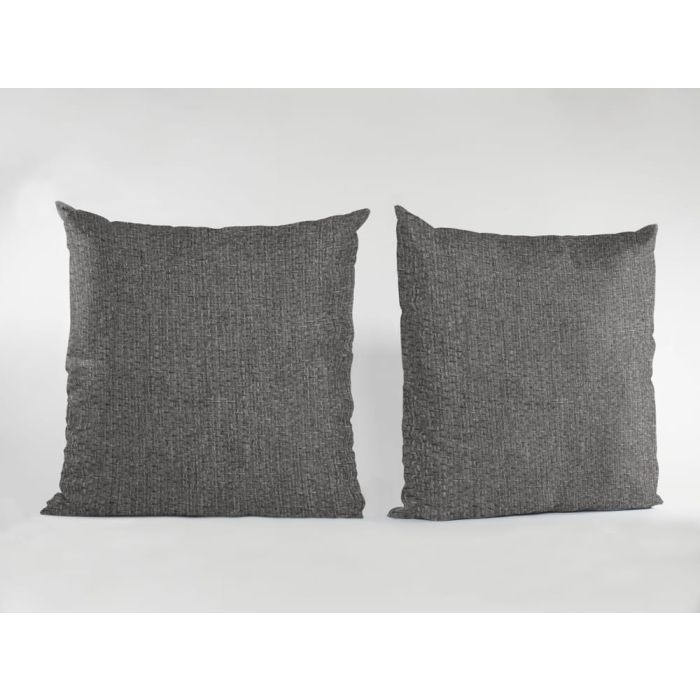
Iris FR 45cm x 45cm Bespoke Complete Cushion 24 Colours - Pair
3 Weeks or Less
UK Mainland Over £250
FREE
Iris Flame Retardant Cushions: 45cm x 45cm Complete Cushion Pair in Textured Two-Tone Finish
A pair of Iris flame retardant cushions in a standard 45cm x 45cm size. The Iris design has a two-tone textured effect, specified when you want a plain-style cushion with added depth rather than a flat, single-colour surface.
Flame Retardant
Suitable where FR accessories are specified
Two-Tone Texture
Depth and structure without a pattern

45cm x 45cm
Standard square cushion size
Cushion Pair
Supplied as a pair (complete cushions)
Colour Options
Select from the Iris colour list
Docs Available
Care guidance & certificates in the spec tab
Expectation setting: These are decorative cushions designed to coordinate with wider soft furnishing schemes. Texture and colour can present differently under varying lighting and on-screen; for specification-critical work, use a swatch sample before confirming.
Overview of Iris flame retardant cushions
Iris cushions provide a simple way to introduce the Iris two-tone textured look into seating and soft furnishing schemes. The finish is designed to add depth and visual interest while remaining easy to coordinate with curtains and other accessories.
Supplied as a complete cushion pair in a standard 45cm x 45cm size, this product is intended for projects that need a consistent accessory specification without sourcing separate components.
Flame retardant certification and care guidance should be referenced from the Specifications tab where provided, to support project sign-off and on-site compliance records.
Where this fits in our range
This is the matching cushion option for schemes that use the Iris textured range. Choose it when you want the Iris look carried through into accessories. If you need a flatter, more minimal plain cushion finish, select a smooth plain range instead.
Best suited for
- Hotel, care and education schemes requiring coordinated FR accessories
- Bedrooms, lounges and reception seating where a textured plain finish is preferred
- Multi-room projects needing consistent colour selection from a defined range
Who uses Iris flame retardant cushions
Iris cushions are specified where a flame retardant accessory is required to complement curtains and soft furnishings, particularly in hospitality, care environments and education settings.
The textured, two-tone appearance supports contemporary schemes and can be used to add contrast or zoning by selecting different colours within the Iris range.
Coordination approach
Use one Iris colour for core seating areas and a second colour as an accent cushion to introduce contrast without changing fabric style. This helps maintain a consistent specification across a project while still adding variation.
Technical specifications
| Product | Iris flame retardant cushion pair (complete cushions) |
| Finished size | 45cm x 45cm |
| Design | Two-tone textured effect |
| Colour options | As listed in the colour selector on this product |
| Flame retardant | Yes (documentation available where provided) |
| Estimated delivery | 3 weeks or less |
For contract documentation, certificates and any available care guidance should be downloaded or requested from the specification tab where applicable. Retain documentation alongside your order reference for project records.
| Features | Flame Retardant |
|---|---|
| Delivery | 3 Weeks or Less |
| Flame Retardant | Yes |
| Fabric Style | Plains |
| Fabric Width (cm) | 140cm |
Are my products certified for use in a public place?
How do I place an order?
What payment methods do you accept?
What are your delivery times?
What is your returns policy?
What does FR or flame retardant mean?
How to Measure for a Recess Fitted Blind
Do I get a certificate to show my products are flame retardant?
Customer Product Reviews
How to Measure For Curtains, Blinds and Tracks.
Make sure your curtain tracks and poles are fitted in the position you want.
Choose the type of curtains that you would like and how you want to hang your curtains. See our heading styles guide
We recommend fitting your hardware first before measuring, this avoids any issues with not getting the perfect fit.
Measure your window using our main guide. Quick summary below. Remember wave, pinch, and designer headings require slightly different measurement
Measure in 3 places and take the shortest drop – Floors and ceilings can run out.
Double / Triple check your measurements

Choosing your Curtain Track Width
The width of the curtain track should extend past your window this allows for the curtains to stack back away from your window and allow light in.
Measure your recess and then add on 15cm on either side. For acoustics , we recommend further to fully cover the window and the surrounding area. In our test we added an additional 30cm to the width and also made the curtain floor length.
Wave curtains, for every 100cm of track the curtains will stack circa *18cm
Eyelet curtains, they will stack back circa 10cm per *70cm of track width
Pencil Pleat will stack approx 25% of the track width. eg. 210cm track will stack 52.5%
* all dependent on thickness of fabric
Selecting your Curtain Drop
Where to Measure From for Different Type of Curtains
|
Type of Curtains |
Fitted On |
Where to Measure from - to desired length |
|
Pencil Pleat Curtains |
Curtain Track |
Top of the Track - If using a extra wide track or designer track like silent gliss metropole, then measure from the underside of the track. |
|
Pencil Pleat Curtains |
Curtain Pole |
Measure from small ring at the bottom of eye under the ring, this is where your curtain clips into. |
|
Eyelet Curtains |
Curtain Pole – Only |
Top of the pole *we add on the upstand to our curtains, |
|
Pinch Pleat Curtains |
Curtain Track |
The underside of the track |
|
Wave Curtains |
Curtain Track Designer Pole |
The glider underneath the track. The curtain will sit under the track. |
|
Acoustic Curtains |
See Heading Style of Choice above |
Same but make sure wider than normal ideally 30cm past either side and 30 above. Also to the floor. |
How to Measure for Blinds going Inside the Recess
- Measure the exact width of the recess in three places; at the top of the recess, in the centre of the recess and near the bottom - then take the smallest size.
- Measure the exact drop of the recess in three places on the left hand side of the recess, in the centre of the recess and on the right hand side of the recess - then take the smallest size.
- We will take one cm off the finished width size you have given us, to allow for the blind to pull up and down easily.
- Double check your measurements
- Cord Safety - Mounting Height - We ask for the mounting height of your blinds to allow for the cord to be 150cm off the ground. If mounting at 210cm This is what you enter in the Fitting height box. We make a deduction to ensure the cord is 150cm from the floor. Thus the cord loop will be 60cm
How to Measure Outside of the Recess
- Measure the recess in 3 places on the width and also 3 places on the drop. Take the widest measurement.
- Measure the width of the actual recess plus an additional amount – Usually from 7cm-15cm whatever you think looks appropriate. This is for overlap.
- Measure the exact drop of the recess. The blind would be fitted above the recess, so check the space above and add an amount on to the drop – usually from 7-15cm
- These sizes you have taken will be the size of the finished blind.
- Double check your measurements
- Cord Safety - Mounting Height - We ask for the mounting height of your blinds to allow for the cord to be 150cm off the ground. If mounting at 210cm This is what you enter in the fitting height box. We make a deduction to ensure the cord is 150cm from the floor. Thus the cord loop will be 60cm
Cubicle Tracks you have to measure with right angles from wall to wall where you want the track to go
Draw your room on a piece of paper with a sky view
Now measure from the wall to wall for straight tracks,
L Shape Tracks Measure to a point on the floor and mark with a piece of tape. Then for the other sides measure from the other wall to that point.
Always check for obstructions and fitting issues you may need to work around
SAVE TIME - Send your project requirements, large or small. Sample Lists etc