


Contract Corded Curtain Track | CCT | 25kg
 Made To Measure
 Heavy Weight
 British Made
 5 Year Guarantee
Contract Corded Curtain Track | CCT | 25kg
Made To Measure
Heavy Weight
British Made
5 Year Guarantee

7 Working Day Delivery
UK Mainland Over £250
FREEWhen ceiling fixing with wave gliders, allow for the wave pleat depth. For 60mm wave allow 80mm from the wall. For 80mm wave allow 100mm from the wall.
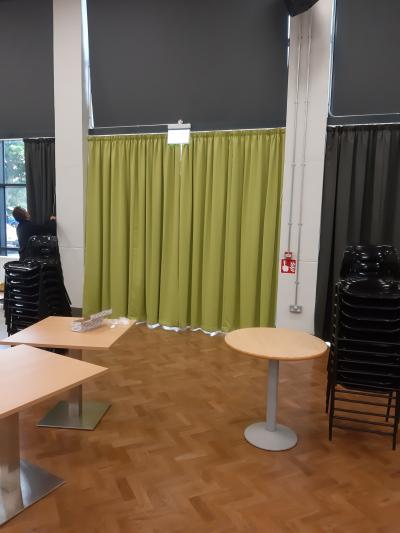
Ceiling or Wall Mounted Heavy Duty Cord Drawn Curtain Track
Made to measure aluminium cord operated curtain track designed for large and heavy curtains in both contract and domestic environments.
Simple Installation
Top fix or wall fix
Heavy Weight
Heavy duty up to 40kg
Made to Measure
Manufactured to your exact size
Exceptional Quality
Aluminium profile with roller runners
Cord Operated
Smooth corded operation
Complete Kit
Everything for one installation
Load guidance
Supplied with 12 gliders per linear metre. Each runner rated to 1kg.
400cm track includes 48 gliders supporting up to 48kg curtain weight, subject to correct fixing.
Performance depends on suitable substrate and correct installation.
Track configuration
Ceiling or wall bracket options.
Cord drawn for controlled movement of heavier curtains.
White or black with matching components.
Key features
- Heavy duty aluminium construction
- Heavy duty roller runners
- 12 gliders per linear metre
- 1kg load per glider
- Ceiling or wall fixing
- Complete installation kit
- Available in white or black
Installation video
Suitable applications
- Hotel bedroom curtains
- Theatre surround curtains
- Stage curtains up to approximately 10m x 4m
- Village halls
- School halls
- Large domestic windows
Why choose this track
Designed for demanding environments requiring reliable cord operated control of heavier curtains. Suitable for contract and domestic use.
Mounting brackets


Contract curtain track colours


| Features | Standard Gliders, 60 or 80mm Wave |
|---|---|
| Operation | Cord |
| Delivery | 7 Working Day Delivery |
How to Install Curtain Rails & Blinds into Plaster Board
How to Calculate Curtain Weight?
How to Measure for a Ceiling-Fixed Curtain Track?
How to Measure for a Wall-Fixed Curtain Track?
How to Measure for a Recess Fitted Blind
How do I calculate how much curtain fabric I need?
Customer Product Reviews
Top customer reviews
Reviews with images

Images in this review
-
Replacement curtain railThe curtain rail arrived fully constructed and was a perfect fit0 people found this helpful
-
Curtains and Tracks<p>New curtains and Tracks supplied. Customer installed themselves. Very happy with them</p>
 0 people found this helpful
 -
Wonderful experience give credit...Wonderful experience give credit where it's due sent over specs start of the week and it's been delivered all perfect sized and up and fully working pleasure doing business0 people found this helpful
-
A really helpful experience...A really helpful experience with someone helping and guiding us along the way.0 people found this helpful
-
Jane deserves much more than 5 starsJane was extremely helpful and very patiently answered questions raised by Glynis. The item arrived within 1 day of the order being placed.0 people found this helpful
-
Contract Corded Track White
0 people found this helpful


How to Measure For Curtains, Blinds and Tracks.
Pen and Paper
For recording your
measurements.
Helper
Someone to assist if your
windows are large .
Metal Tape Measure
As this will allow you to get a
rigid full length measurement.
Make sure your curtain tracks and poles are fitted in the position you want.
Choose the type of curtains that you would like and how you want to hang your curtains. See our heading styles guide
We recommend fitting your hardware first before measuring, this avoids any issues with not getting the perfect fit.
Measure your window using our main guide. Quick summary below. Remember wave, pinch, and designer headings require slightly different measurement
Measure in 3 places and take the shortest drop – Floors and ceilings can run out.
Double / Triple check your measurements

Choosing your Curtain Track Width
The width of the curtain track should extend past your window this allows for the curtains to stack back away from your window and allow light in.
Measure your recess and then add on 15cm on either side. For acoustics , we recommend further to fully cover the window and the surrounding area. In our test we added an additional 30cm to the width and also made the curtain floor length.
Wave curtains, for every 100cm of track the curtains will stack circa *18cm
Eyelet curtains, they will stack back circa 10cm per *70cm of track width
Pencil Pleat will stack approx 25% of the track width. eg. 210cm track will stack 52.5%
* all dependent on thickness of fabric
Selecting your Curtain Drop
Where to Measure From for Different Type of Curtains
|
Type of Curtains |
Fitted On |
Where to Measure from - to desired length |
|
Pencil Pleat Curtains |
Curtain Track |
Top of the Track - If using a extra wide track or designer track like silent gliss metropole, then measure from the underside of the track. |
|
Pencil Pleat Curtains |
Curtain Pole |
Measure from small ring at the bottom of eye under the ring, this is where your curtain clips into. |
|
Eyelet Curtains |
Curtain Pole – Only |
Top of the pole *we add on the upstand to our curtains, |
|
Pinch Pleat Curtains |
Curtain Track |
The underside of the track |
|
Wave Curtains |
Curtain Track Designer Pole |
The glider underneath the track. The curtain will sit under the track. |
|
Acoustic Curtains |
See Heading Style of Choice above |
Same but make sure wider than normal ideally 30cm past either side and 30 above. Also to the floor. |
How to Measure for Blinds going Inside the Recess

- Measure the exact width of the recess in three places; at the top of the recess, in the centre of the recess and near the bottom - then take the smallest size.
- Measure the exact drop of the recess in three places on the left hand side of the recess, in the centre of the recess and on the right hand side of the recess - then take the smallest size.
- We will take one cm off the finished width size you have given us, to allow for the blind to pull up and down easily.
- Double check your measurements
- Cord Safety - Mounting Height - We ask for the mounting height of your blinds to allow for the cord to be 150cm off the ground. If mounting at 210cm This is what you enter in the Fitting height box. We make a deduction to ensure the cord is 150cm from the floor. Thus the cord loop will be 60cm
How to Measure Outside of the Recess

- Measure the recess in 3 places on the width and also 3 places on the drop. Take the widest measurement.
- Measure the width of the actual recess plus an additional amount – Usually from 7cm-15cm whatever you think looks appropriate. This is for overlap.
- Measure the exact drop of the recess. The blind would be fitted above the recess, so check the space above and add an amount on to the drop – usually from 7-15cm
- These sizes you have taken will be the size of the finished blind.
- Double check your measurements
- Cord Safety - Mounting Height - We ask for the mounting height of your blinds to allow for the cord to be 150cm off the ground. If mounting at 210cm This is what you enter in the fitting height box. We make a deduction to ensure the cord is 150cm from the floor. Thus the cord loop will be 60cm

Cubicle Tracks you have to measure with right angles from wall to wall where you want the track to go
Draw your room on a piece of paper with a sky view
Now measure from the wall to wall for straight tracks,
L Shape Tracks Measure to a point on the floor and mark with a piece of tape. Then for the other sides measure from the other wall to that point.
Always check for obstructions and fitting issues you may need to work around

SAVE TIME - Send your project requirements, large or small. Sample Lists etc